
Updated on 17th November 2023 to reflect the latest changes in the Semantic Kernel APIs:
- All the Azure OpenAI extension methods have been renamed from Azure to AzureOpenAI. For example,
WithAzureChatCompletionService()is nowWithAzureOpenAIChatCompletionService().
Let’s continue our journey to discover how we can infuse AI in our applications with Semantic Kernel, an open-source SDK created by Microsoft for C#, Python, and Java developers. In the previous post, we saw some of the first useful features offered by Semantic Kernel: the ability to easily setup multiple AI providers and prompt templates. In this post, we will explore the first type of plugins: semantic functions.
What are semantic functions?
In the previous post, we have already seen what is a semantic function in the context of Semantic Kernel: it’s basically just a prompt, that is sent to the LLM for processing. The sample we have seen the last time, however, wasn’t very scalable in the context of building an enterprise application. The prompt was hard coded and, as such, it’s hard to share it with other components of our application.
In this post, we’re going to improve the process by moving the semantic function into a plugin, so that it can easily be reused across multiple apps and scenarios. Additionally, this feature enables us to fine tune and change the prompt without having to recompile the application.
Creating a semantic function plugin
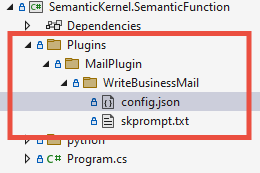
Let’s start from the same project we used the last time and let’s create a new folder, called Plugins. Inside this folder, we’re going to create a new sub-folder dedicated to our plugin. We’re going to call it MailPlugin, since it’s going to include our prompt to take a sentence and turn it into a business mail. A plugin can offer multiple functions, each of them represented by a different prompt. Let’s create a function to host our business mail problem, so let’s add another subfolder called WriteBusinessMail.
Inside the WriteBusinessMail folder, we can now add the files we need to define our function. The first one is the file which contains the prompt itself, which is simply a text file called skprompt.txt. Inside it, we just need it copy and paste the same prompt we included in code in the previous post:
| |
The second file you must add is called config.json and it’s used to setup the same LLM parameters that, in the previous post, we were setting using the OpenAIRequestSetting class. The content of the file is the following:
| |
Notice how we aren’t using this file only to setup the LLM parameters, but also to describe what the prompt does and how it works. Using the description property, we’re specifying that this prompt is used to write a business mail. In the input section, we’re specifying that the prompt accepts one parameter called input, which contains the text to convert. The importance of these properties will become clear in the future, when we will talk about the planner and its ability to automatically orchestrate AI operations.
This is how the structure of a plugin that contains a semantic function looks like:
Using the semantic function plugin
Now that we’ve created a plugin with a semantic function, we can start using it. First we have to bootstrap the kernel like we did the last time:
| |
Then we need to import the plugin into the kernel:
| |
First, we retrieve the full path of the Plugins folder within the project, using the Path.Combine() and the Directory.GetCurrentDirectory() methods. Then, we import all the functions included in the plugin (in this case, it’s just one) in the kernel by calling the ImportSemanticFunctionsFromDirectory() method, passing as parameters the path of the plugins folder and the name of the plugin.
Now we can reference any function included in the plugin using the Functions collection. The following code shows how we can get a reference to the WriteBusinessMail function included in the plugin:
| |
Now we can use the function in the same way we have previously used the hardcoded prompt:
| |
We use the ContextVariables collection to define the value of the input variable and we pass it to the RunAsync() method, together with the function we want to execute. The result is the same as the one we got the last time:
| |
Testing the semantic functions in a prompt
Testing the effectiveness of a prompt in an application isn’t always easy. Our console app is very simple, so it’s really easy to tweak the prompt and launch the application again. Enterprise applications aren’t that simple and they might be composed by multiple layers, so recompiling and relaunching everything might be a very time consuming task.
To help you testing your prompts, Microsoft has released a very useful extension for Visual Studio Code. You can get if from the marketplace.
Once it’s installed and activated, you will find a new icon in the toolbar:
![]()
After you click on it, the first step is to expand the AI Endpoints section and click on the Switch endpoint provider button to select the provider you want to use between OpenAI, Azure OpenAI and Hugging Face. Based on the provider you select, you will be asked to provide the required credentials, similar to what you did when you set the kernel up in code.
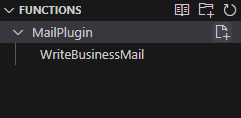
Once you have configured the AI service you want to use, click on File in Visual Studio Code and choose Open folder. Now open the folder which contains your Semantic Kernel based project. Once you do that, the Functions panel of the Semantic Kernel extension will display all the functions that have been found in the project. You should see your MailPlugin, with the WriteBusinessMail function nested inside:
If you hover the mouse near the name of the function, you will see a Run button appear. Click on it and Visual Studo Code will ask you to provide a value for the variables included in the prompt, in this case the input variable:

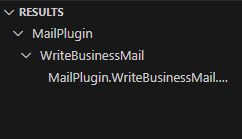
Once the operation is completed, in the Output window in Visual Studio Code you will see the result of the operation: the duration, the number of tokens used, the response from the LLM. Even better, if you open again the Semantic Kernel panel, you will see the result of the operation in the Results section:
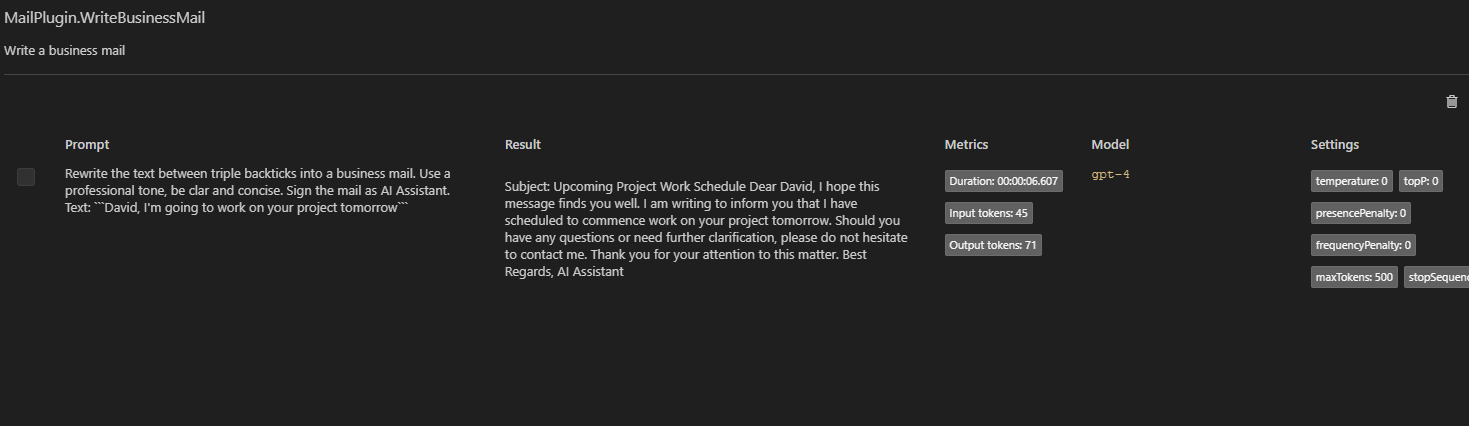
If you click on the results, you will see the full details of the response in a table format:
Wrapping up
In this post, we learned how to build our first plugin that includes a semantic function. This is a major improvement compared to having the prompt hard coded, since it allows us to reuse it across different apps. Additionally, if we want to make some changes to the prompt, we can do it without having to recompile the application.
As usual, you will find the sample used in this post in the GitHub repository. The sample used in this post is the project called SemanticKernel.SemanticFunction.