
In one of my latest posts on this blog, we covered Kernel Memory, a very powerful open-source service created by Microsoft that you can use to greatly simplify the implementation of the Retrieval Augmented Generation (RAG) pattern in your applications, so that you can more easily build AI powered experiences that are fueled by your data. In that post, we covered the usage of Kernel Memory in serverless mode, which means that the Kernel Memory instance runs in the same process of the application which is using it. This approach makes the implementation and the deployment simpler, but it isn’t very efficient, since the Kernel Memory instance is tied to the application instance and it’s not possible to share it across multiple instances of the same application. Additionally, the performance of your application (regardless if it’s a frontend, a backend, an API, etc.) will be impacted by the work done by Kernel Memory, since it’s running in the same process.
In this post, we’ll cover how you can setup Kernel Memory to be used as a service. Being an independent application, you can deploy it in a separate environment than the one of your main application, allowing you to setup different scaling rules.
Configuring Kernel Memory as a service
Kernel Memory as a service is simply exposed as a REST API, that your application can call to perform the various operations we have learned about in the previous post, like uploading a new document or asking a question about your data. This means that Kernel Memory can be easily used regardless of the technology stack you’re using, as long as you can make HTTP requests. If you’re using C# and .NET, however, you can use a NuGet package instead of manually calling the REST APIs, which implements the same base interfaces of the classes used in serverless mode. This means that you can easily switch from using Kernel Memory in serverless mode to using it as a service, without having to change the code you’re using to ingest and interact with your content.
Kernel Memory as a service is available in two ways:
- As a .NET Web API, which gives you the flexibility to be executed in any environment that supports .NET, either on-premises or in the cloud.
- As a Docker container, so that you can easily leverage cloud platforms like Azure Kubernetes Services or Azure App Containers to deploy and scale it.
Before moving on with the rest of the post, we have first to clone or download a copy of Kernel Memory from the official GitHub repository.
Regardless of the approach you prefer to use (we’ll dive into both of them in the rest of the post), the first step is to configure the service. When we use the serverless mode, we do this using code, like we have seen in the dedicated post:
| |
When we use it as a service, instead, we need to use the settings stored in the configuration file of the application, the one called appsettings.json. You can take a look as its definition by opening the appsettings.Development.json file in the service\Service folder of the repository. You will notice that the file is quite complex, because Kernel Memory supports multiple settings and services, and each of them requires its own configuration. To simplify setting up the configuration file, Kernel Memory comes with a wizard that can generate the configuration file for you. Open a terminal on the service\Service folder and run the following command:
| |
The wizard will ask you a series of questions to understand which services you want to enable and how you want to configure them. Let’s see them step by step:
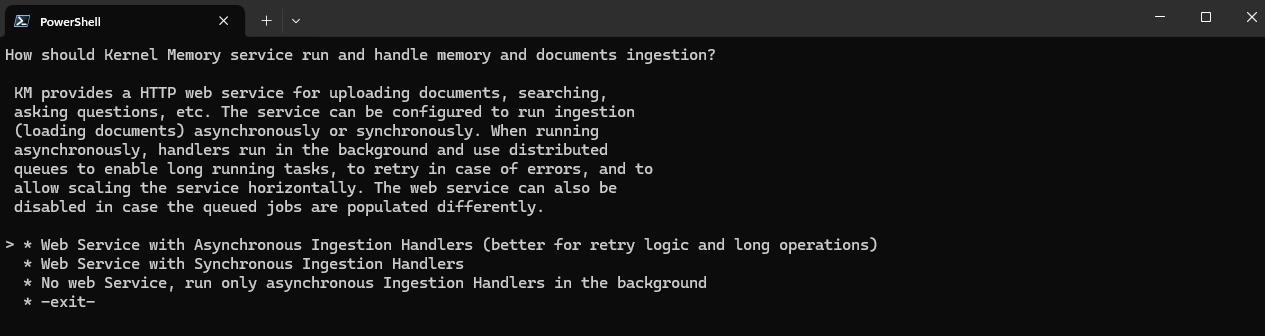
- How should Kernel Memory service run and handle memory and documents ingestion? You can choose if you want to use Kernel Memory as a web service or only for ingesting content. In the second case, you will have to provide your own mechanism to queue the ingestion jobs. The preferred choice for a standard scenario is Web Service with Asynchronous Ingestion Handlers".
- Protect the web service with API Keys? This option is highly recommended if you’re planning to expose the service to the Internet. This way, you will need to provide an API key when you call the service, otherwise the request will fail. Without this option turned on, anyone who knows the URL of your endpoint will be able to use your instance of the service. If you choose Yes, you will be asked to provide two API keys.
- Enable OpenAPI swagger doc at /swagger/index.html?. The Kernel Memory service comes with built-in support for OpenAPI, an open format to describe how an API works. By setting this option to Yes, you will expose the Swagger documentation at the
/swagger/index.htmlendpoint, which will enable you to easily understand how the API works and test it. - Which queue service will be used?. Kernel Memory supports the usage of queues to better scale the ingestion of documents. For the sake of testing, you can just choose *SimpleQueues, which will store in memory.
- Where should the service store files? Kernel Memory will store in this location the files that will be ingested. Also in this case, for the sake of testing, you can just choose SimpleFileStorage, which will just use the local file system.
- Which service should be used to extract text from images?. Kernel Memory supports ingesting images as a document type. However, to enable this feature, you need to connect Kernel Memory to Azure AI Document Intelligence, an Azure service that is capable of extracting text from images. If you choose to enable it, you will need to provide the endpoint and the API key that you can retrieve from the Azure portal.
- When importing data, generate embeddings, or let the memory Db class take care of it?. Some vector databases offer the option to automatically generate the embeddings as part of the ingestion process. In my case, I’m going to use Azure AI Search as a vector database, so I’m going to let Kernel Memory to generate the embeddings for me by choosing Yes.
- When searching for text and/or answers, which embedding generator should be used for vector search?. The embedding model is the one that is used to convert a text into a vector, so that later it can be stored in a vector database. You can choose between Azure OpenAI, OpenAI or custom. The most common choices are Azure OpenAI and OpenAI, in both cases you’ll need to provide the credentials to authenticate to your service.
- When searching for answers, which memory DB service contains the records to search?. In this step, you can choose which of the supported vector databases you want to use to store the embeddings. In my case, I picked Azure AI Search. If you are just playing with Kernel Memory, you can also choose SimpleVectorDb, which doesn’t require any dependency, but it’s also not suitable for production because embeddings will be stored in memory (so they will be lost when the service restarts) or on disk (which leads to bad performances). Depending on the type of vector database you pick, you’ll need to provide the endpoint and the credentials to access.
- When generating answers and synthetic data, which LLM text generator should be used? This is the LLM that will be used to generate the answers to the questions you ask to Kernel Memory on your data. You can choose between Azure OpenAI, OpenAI or LLama.
- Log level?. The final step allows you to define which level of logging you want to enable, from Trace (log everything) to Critical (log only critical errors).
That’s it!
Now you’re ready to use the service.
Using the Kernel Memory service
The Kernel Memory service is simply a Web API built with .NET, so you can host it locally on your machine, on Azure App Service or any other environment where you can deploy a .NET application. If you want to test the service locally, you can just use the standard .NET command from the command line:
| |
However, it’s likely that the service won’t start the first time because it expects to find an environment variable called ASPNETCORE_ENVIRONMENT. This variable is used by ASP.NET Core to understand which configuration file to use and it’s usually already set in hosting platforms like Azure App Service. On your local machine it’s unlikely that the variable is already set, so you can set it manually by running the following command in a PowerShell terminal:
| |
You’ll need to set it to Development since the wizard we have just completed has created an appSettings.Development.json file, so it will be picked up if it’s a Development environment.
Now if you try dotnet run again, you will see the familiar logging that the service is running and listening on http://localhost:9001. You can test that the service is indeed working by opening a browser and navigating to http://localhost:9001/swagger/index.html. You will see the Swagger documentation that we have enabled in the wizard.
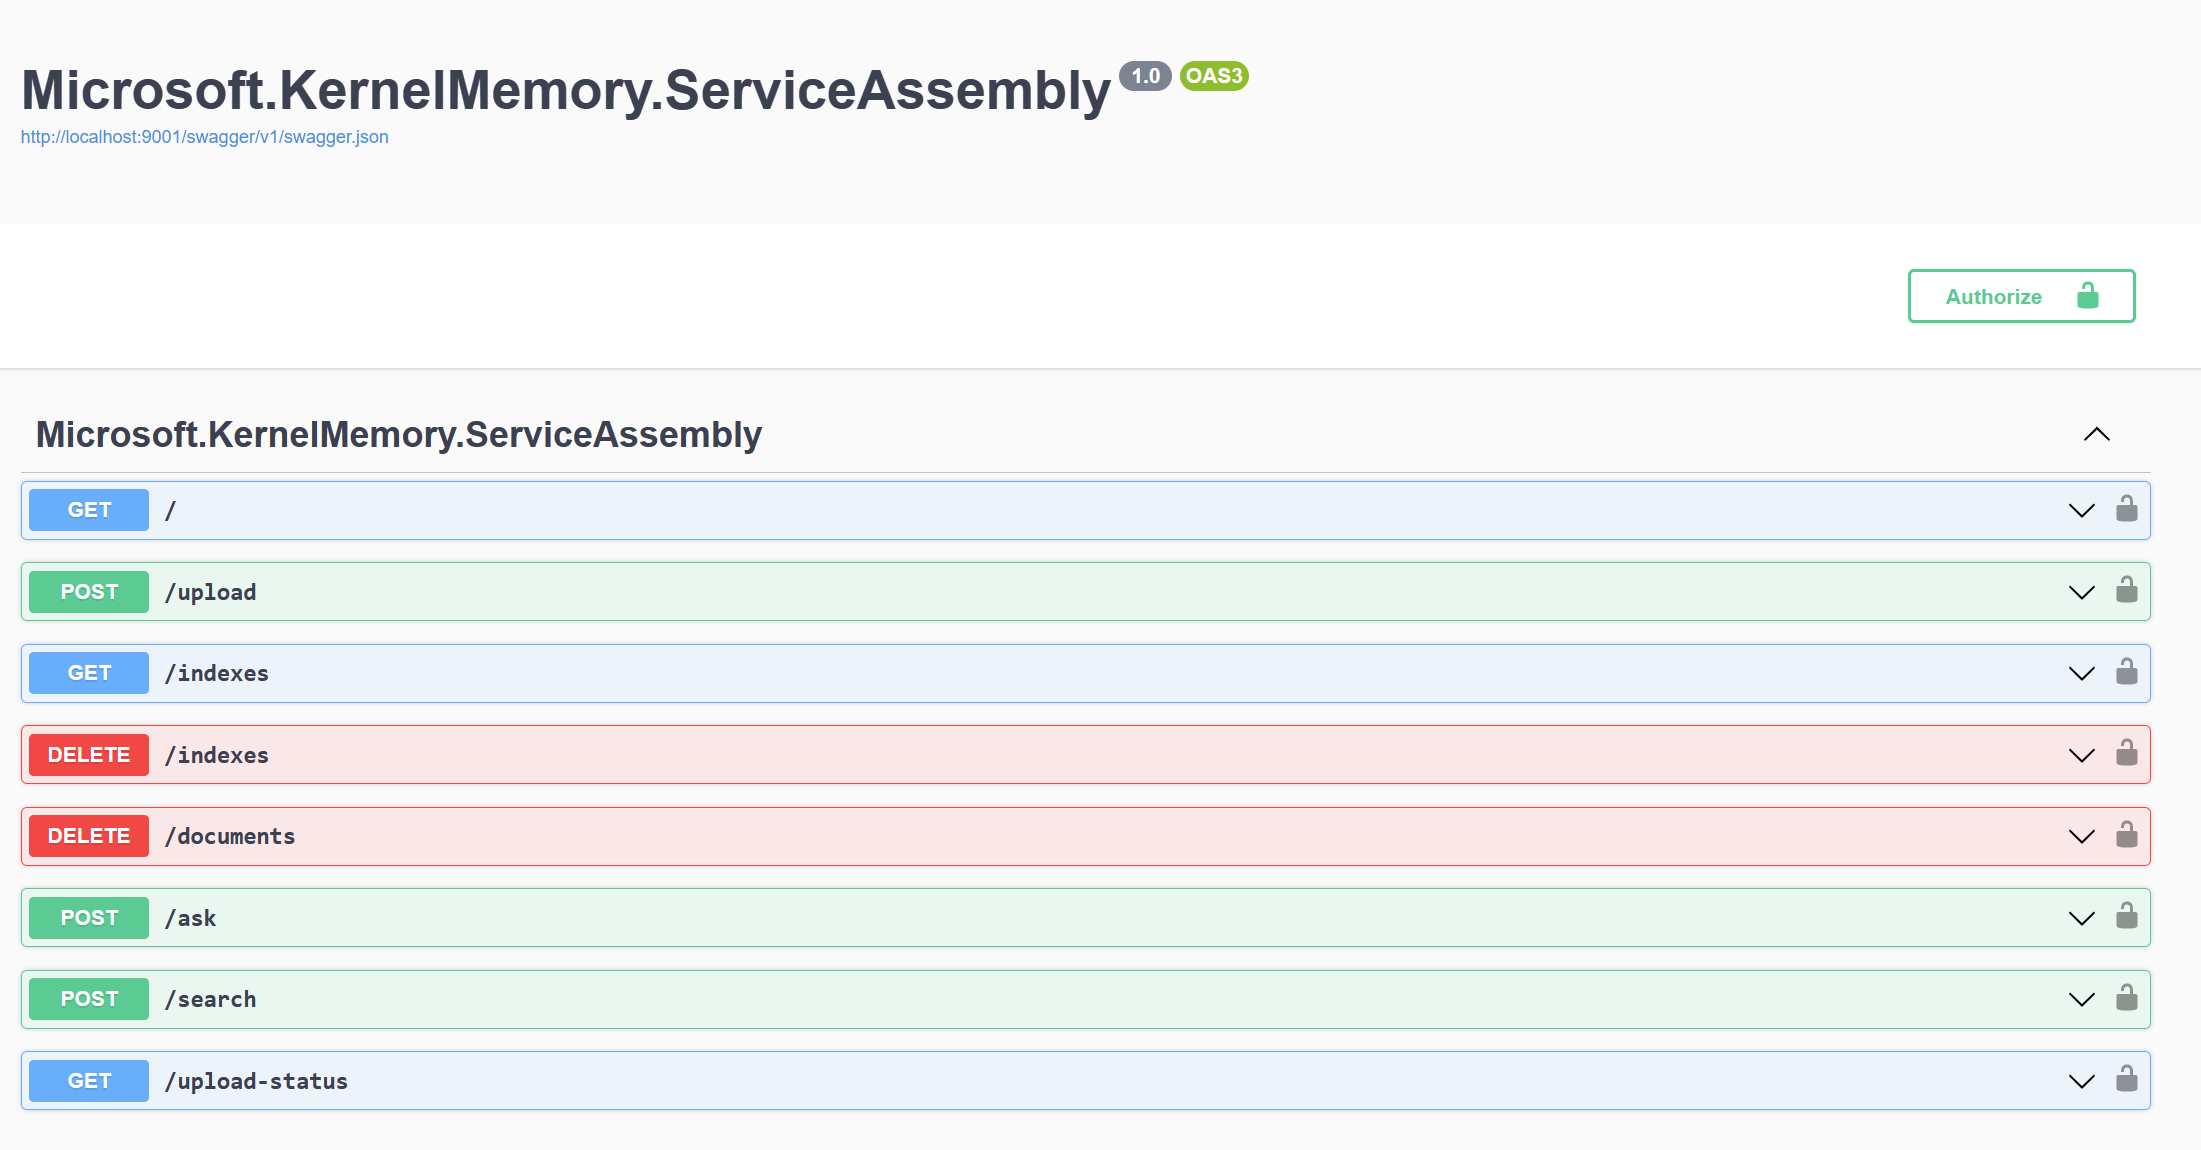
As you can see, the service offers various endpoints that match the various operations we can do with Kernel Memory, like uploading content or asking a question about your data. However, in our case, we won’t use the REST APIs manually, but we’re going to leverage the dedicated NuGet package in our application.
Using the Kernel Memory service from our C# application
Let’s take the sample Blazor app we’ve built in the previous post and change it to use Kernel Memory as a service. The first step is to install a NuGet package called Microsoft.KernelMemory.WebClient. As we have already seen, in our original application we were using the following code to initialize Kernel Memory:
| |
Now we just need to replace it with the following line:
| |
We create a MemoryWebClient object passing, as parameters, the URL of the service and, optionally, the API Key, in case we opted in for authentication during the configuration wizard.
The best part is that the MemoryWebClient class implements the IKernelMemory interface, which is the same interface implemented by the MemoryServerless class we were using before. This means that we can easily switch between the two implementations without having to change the rest of the code. In fact, we can continue to ingest content and ask questions about your data using the same methods we have seen in the previous post, like ImportDocumentsAsync() and AskAsync(), which are implemented in the MemoryService class of our sample project.
Now you can launch again the Blazor application and try to perform the same operations we did in the original post, like ingesting the Contoso employee manual and asking question about it. The outcome will be exactly the same of the original application. However, in the console which is running the Kernel Memory service, you will see from the logging that all the ingestion and question answering operations are being performed by the service, not by the Blazor application.
Being a Web API developed with .NET, now you can deploy it on a cloud platform that supports feature like scaling and replicas, so that you can manage also tougher workloads. In the Microsoft ecosystem, Azure App Service is a great platform for this scenario, since it natively supports .NET applications. Once you have deployed it, you will just need to change the URL in the MemoryWebClient constructor to point to the URL of the service in the cloud.
Using Kernel Memory as a Docker container
If you prefer to use Kernel Memory as a Docker container, you can leverage the image that the team has published on Docker Hub.
To pull the image, make sure that Docker Desktop is installed and running on your machine, then execute the following command:
| |
Once the image has been pulled, however, you can’t do much with it, because you will need to provide the configuration file for the various services. The easiest way to do it is to mount a volume that contains the configuration file you have previously created. You’ll need to execute the following command from the service/Service folder of the Kernel Memory repository:
| |
This command will take the appsettings.Development.json file in the service/Service folder and mount it inside the container as appsettings.Production.json. This renaming is required because, by default, the image is configured with the ASPNETCORE_ENVIRONMENT value set to Production, so it will look for the appsettings.Production.json file. If you did everything correct, you should see the logging of the Kernel Memory service inside the Docker Desktop application:
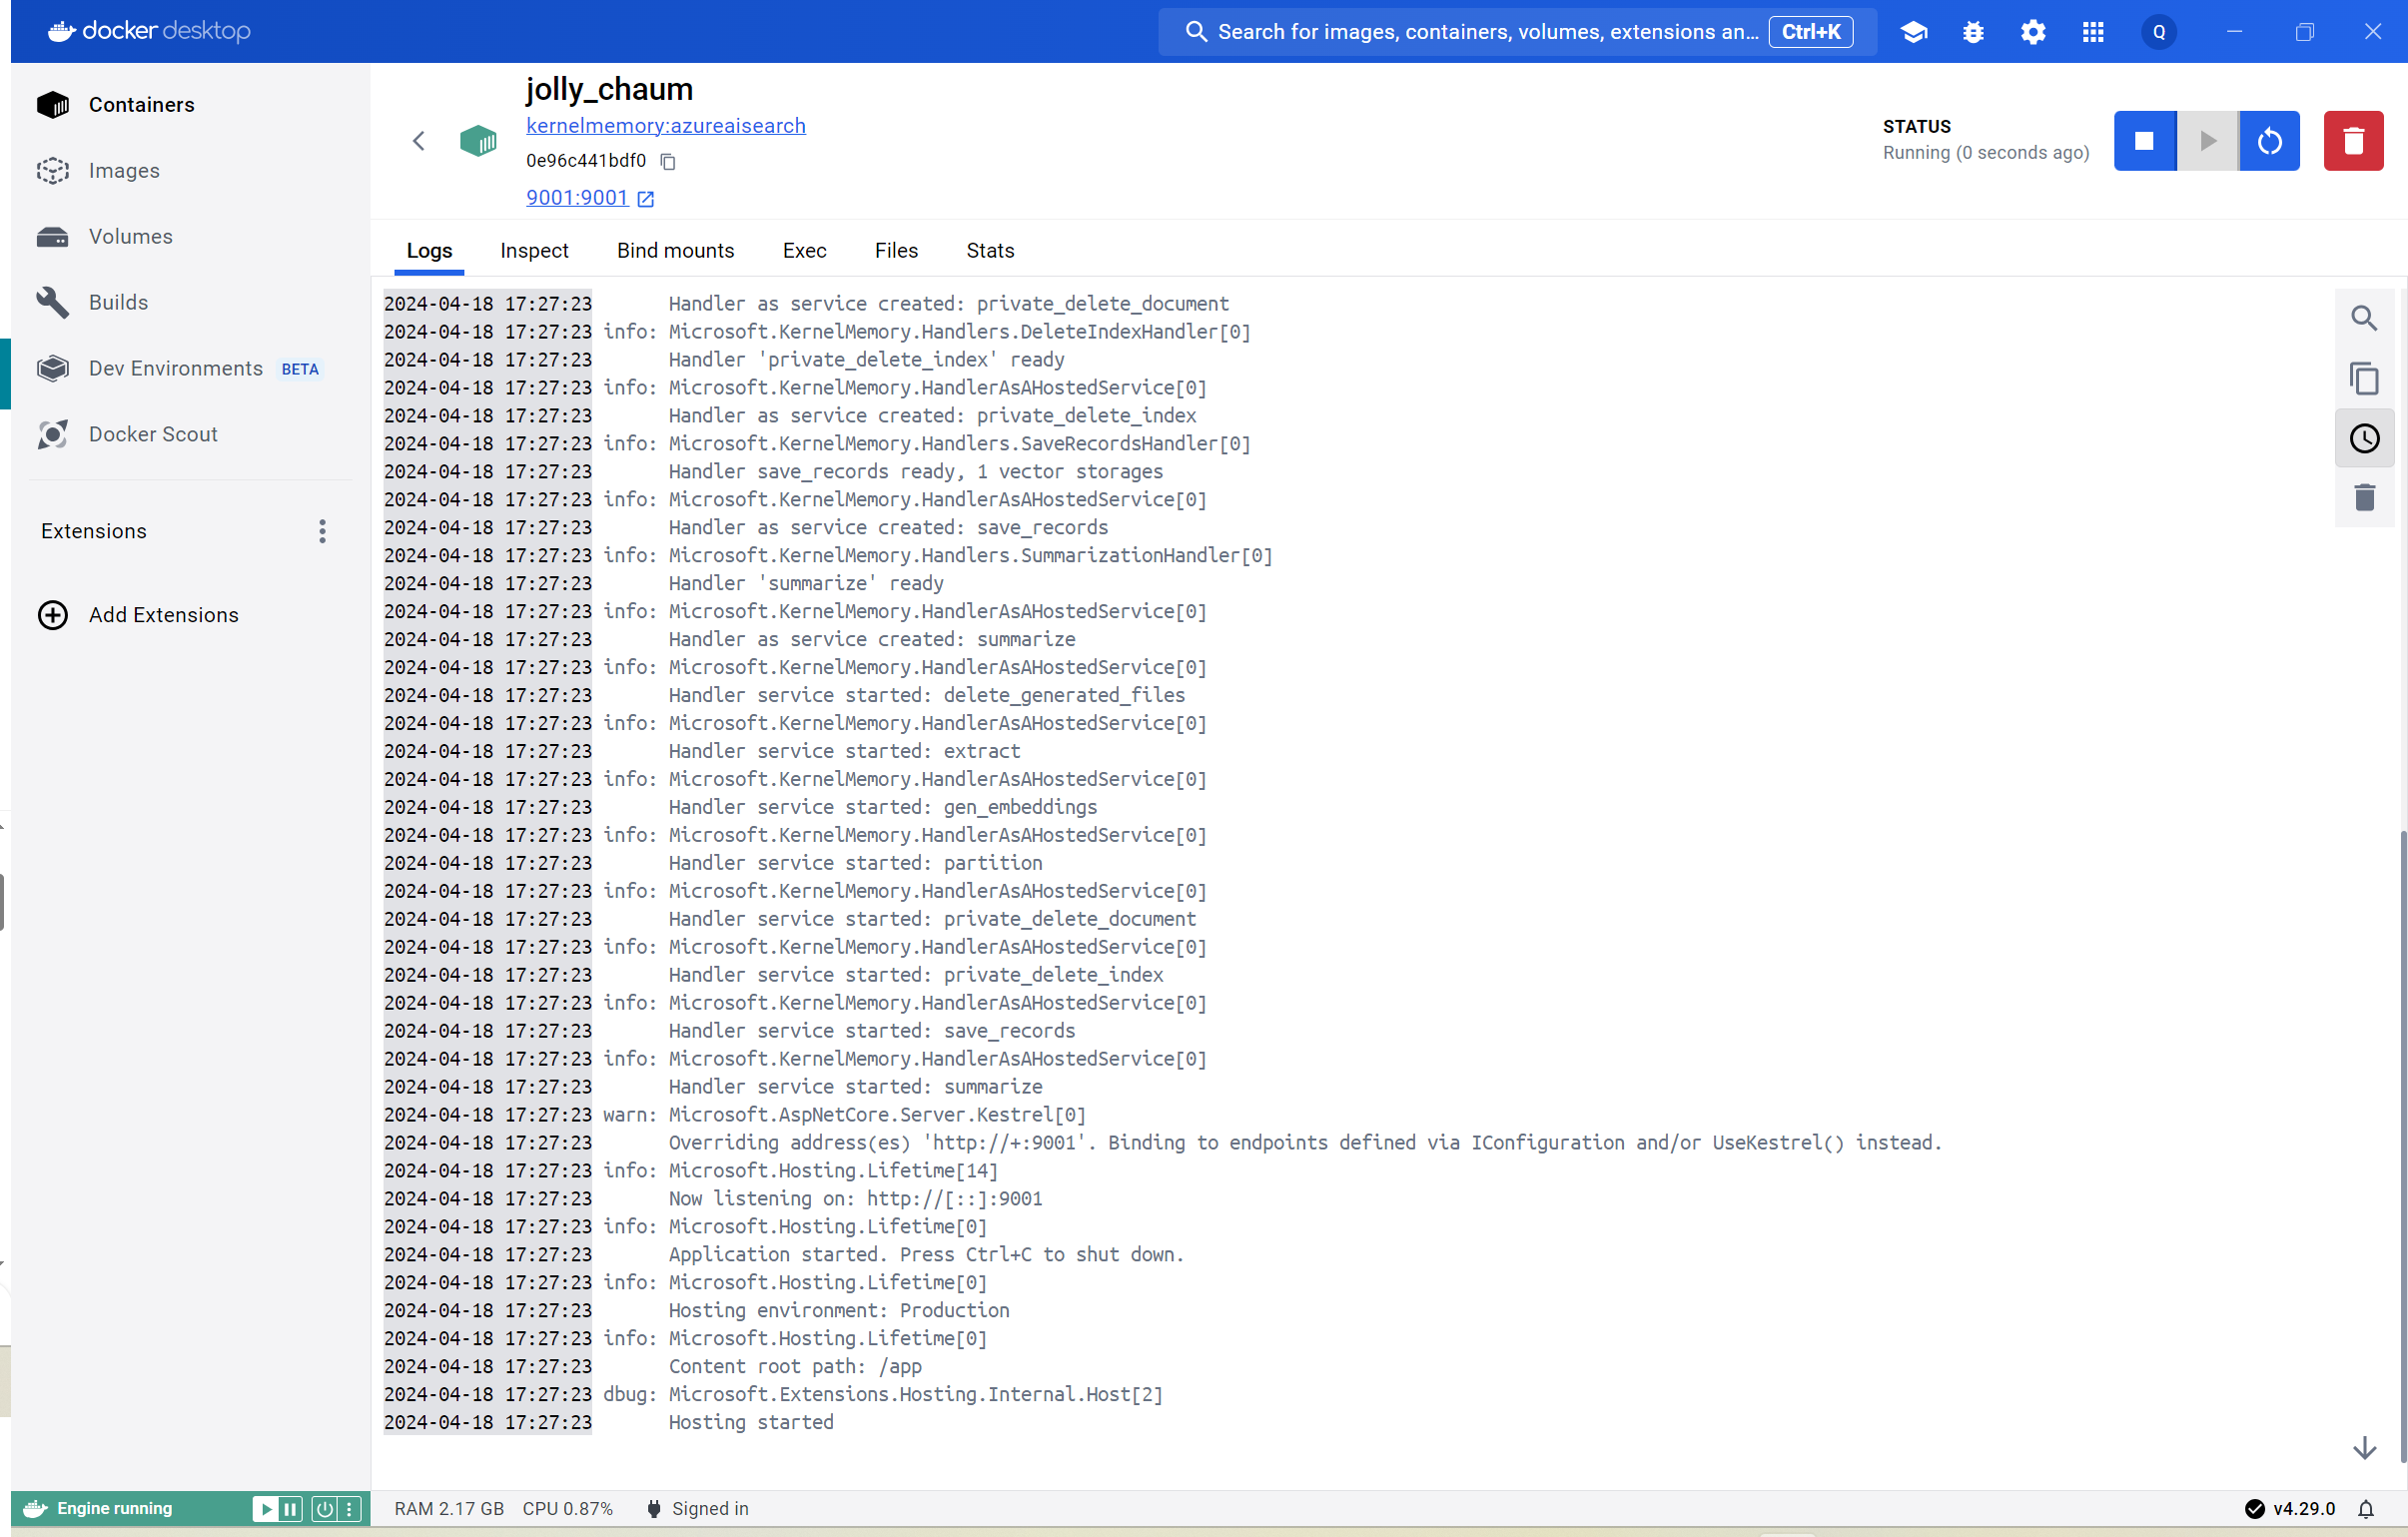
From an application perspective, running Kernel Memory directly on your local machine or as Docker container doesn’t change anything. The service will be exposed at the URL http://localhost:9001/ and you can read the Swagger documentation at http://localhost:9001/swagger/index.html. And, most of all, you can use the same MemoryWebClient class we have seen before to interact with the service.
Wrapping up
In this post, we have seen how you can use Kernel Memory as a service, so that you can build more scalable applications. By running Kernel Memory as a separate application, you can deploy it in a different environment than your main application, allowing you to setup different scaling rules. Additionally, you can leverage the same code you were using to interact with Kernel Memory in serverless mode, since the MemoryWebClient class implements the same interface of the MemoryServerless class. This means that you can easily switch between the two implementations without having to change the rest of the code.
You won’t find an updated version of the Blazor application in the GitHub repository, since the code is almost the same of the original post, except for the different initialization of the MemoryWebClient class.
Happy coding!