In the previous posts of this series, we built an MCP server protected with Microsoft Entra authentication using Azure API Management, and then we consumed it with a declarative agent in Microsoft 365 Copilot. However, declarative agents aren’t the only way to leverage MCP servers in the Microsoft 365 ecosystem. Copilot Studio offers a powerful alternative for building custom engine agents that can connect to MCP servers.
In this post, we’re going to explore how to connect a custom engine agent built with Copilot Studio to our Entra-authenticated MCP server. If you’ve been following the series, you’ll find that the experience is actually quite straightforward, especially after working through the gotchas we encountered with declarative agents. As we’ll see, Copilot Studio provides a streamlined wizard that handles most of the OAuth configuration for us.
This post assumes you’re already familiar with the basics of creating agents in Copilot Studio. We won’t dive deep into how to build custom engine agents from scratch; instead, we’ll focus specifically on the MCP integration and authentication flow.
Let’s get started!
Prerequisites
Before we begin, make sure you have the following in place:
- An Entra-authenticated MCP server: You can use the Flights MCP server we built earlier in this series, or any other MCP server that supports OAuth authentication through Microsoft Entra. The server should be deployed and accessible via a public URL.
- Access to Copilot Studio: You’ll need a valid license to create and test agents, like the Microsoft 365 Copilot or the Copilot Studio User licenses.
- An app registration in Microsoft Entra: This is the same app registration we created to consume our MCP server in GitHub Copilot or in a declarative agent, which includes the client ID, client secret, and the
access_as_userscope we configured.
Creating the custom engine agent
The first step is to create a new custom engine agent in Copilot Studio. Since we’re building a flight search agent that will connect to the Flights MCP server, let’s set it up with appropriate instructions.
- Open Copilot Studio and navigate to your environment.
- Click on Agents, then Create blank agent.
- Edit the name and the description by using something meaningful, such as “Flight Search Agent”.
Now we need to configure the agent instructions. These instructions define the persona and behavior of the agent. For our flight search assistant, I’m using a professional tone with clear guidelines about how to use the available tools:
| |
These instructions tell the agent exactly how to behave and which tools to use in different scenarios. The key is being specific about the capabilities without being overly rigid.
Adding the MCP server
Now comes the interesting part: connecting the MCP server to our agent. Copilot Studio provides native support for MCP servers through a dedicated wizard in the Tools section.
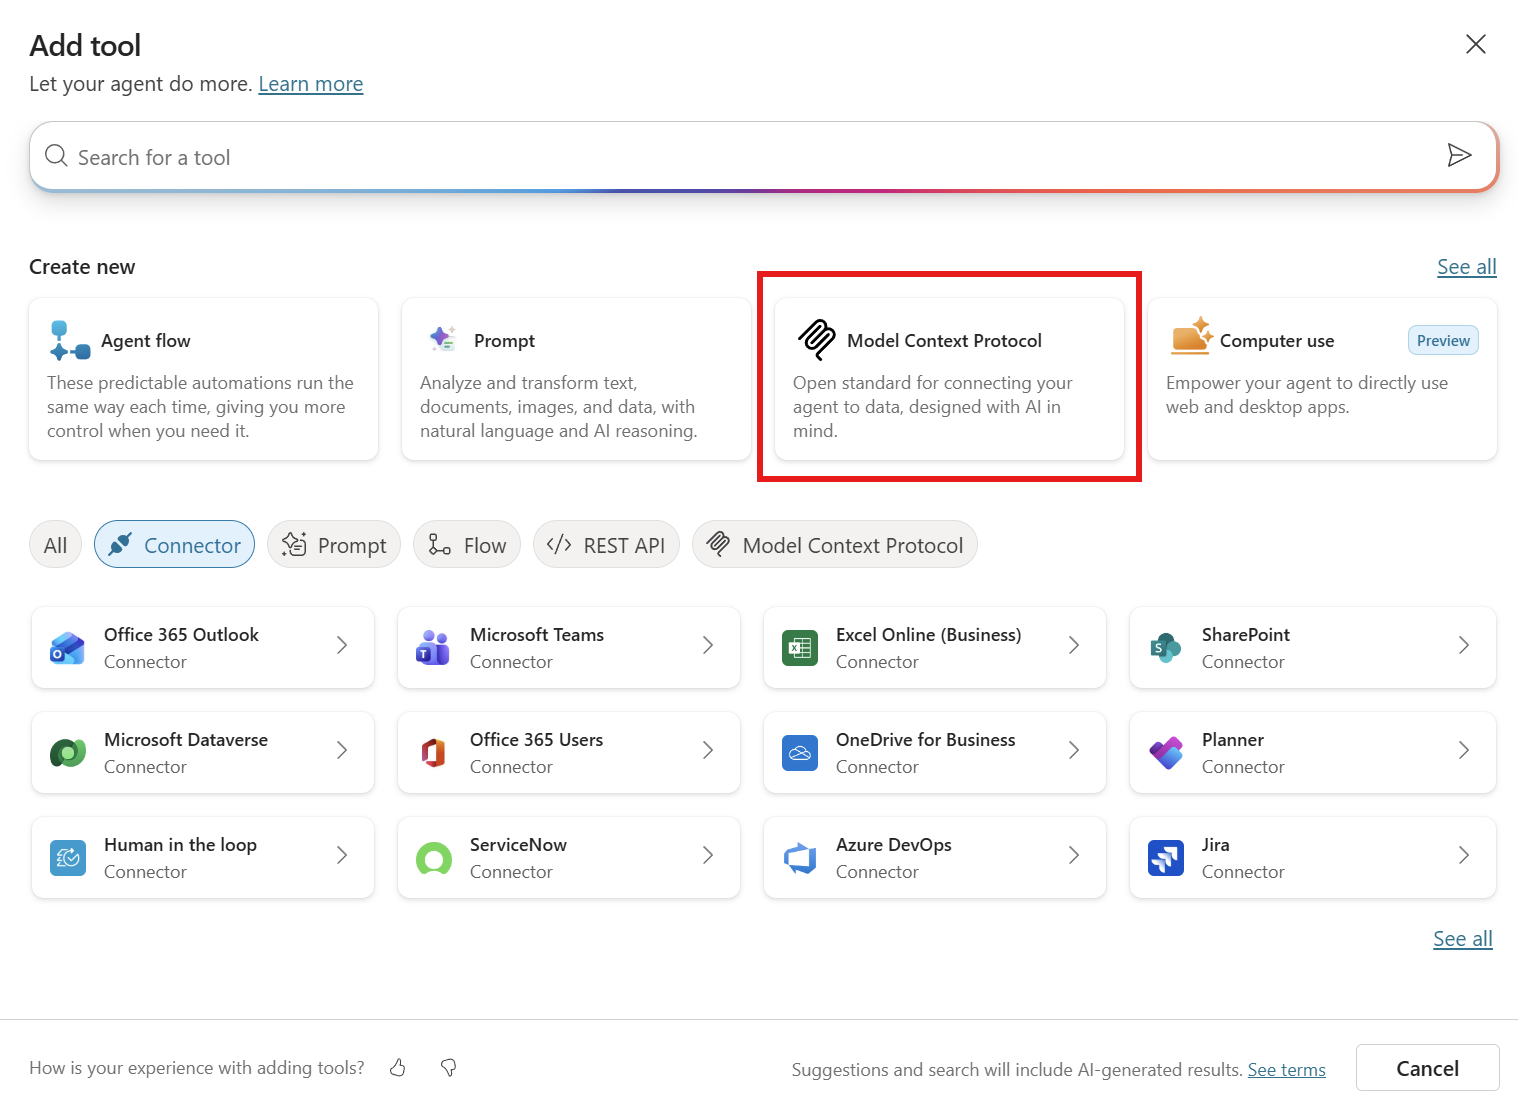
- In your agent, navigate to the Tools section.
- Click on Add tool.
- In the “Create new” area, select Model Context Protocol.
The wizard will ask you for the following information:
- Server name: Give it a descriptive name, such as “Flights MCP Server”.
- Server description: Provide a brief description, like “MCP server for searching flight information”.
- Server URL: Enter the URL of your MCP server. If you followed the previous posts, this will be something like
https://flightsapismcp-apim.azure-api.net/mcp.
Configuring OAuth authentication
Since our MCP server is protected with Microsoft Entra, we need to configure OAuth 2.0 authentication. In the wizard:
- Under Authentication, select OAuth 2.0.
- For the authentication type, choose Manual. This allows us to provide the specific Entra endpoints and credentials.
Now you’ll need to fill in the OAuth configuration details:
| Field | Value |
|---|---|
| Client ID | The Application (client) ID from your app registration |
| Client secret | The secret you created for your app registration |
| Authorization URL | https://login.microsoftonline.com/{tenant-id}/oauth2/v2.0/authorize |
| Token URL | https://login.microsoftonline.com/{tenant-id}/oauth2/v2.0/token |
| Refresh URL | https://login.microsoftonline.com/{tenant-id}/oauth2/v2.0/token |
| Scopes | api://{client-id}/access_as_user |
Replace {tenant-id} with your Microsoft Entra tenant ID and {client-id} with the Application ID of your MCP server’s app registration in the scopes field. If you’re using a multi-tenant app registration, you can use common instead of the tenant-id.
Note: For Microsoft Entra, the Refresh URL is the same as the Token URL. This is standard for Entra’s OAuth 2.0 implementation.
Click Create to save the configuration.
Adding the redirect URL to your app registration
This is a critical step that you must not skip. After clicking Create, Copilot Studio will display a success message along with a Redirect URL. This URL is unique to your Copilot Studio connection and must be added to your app registration before you can proceed.
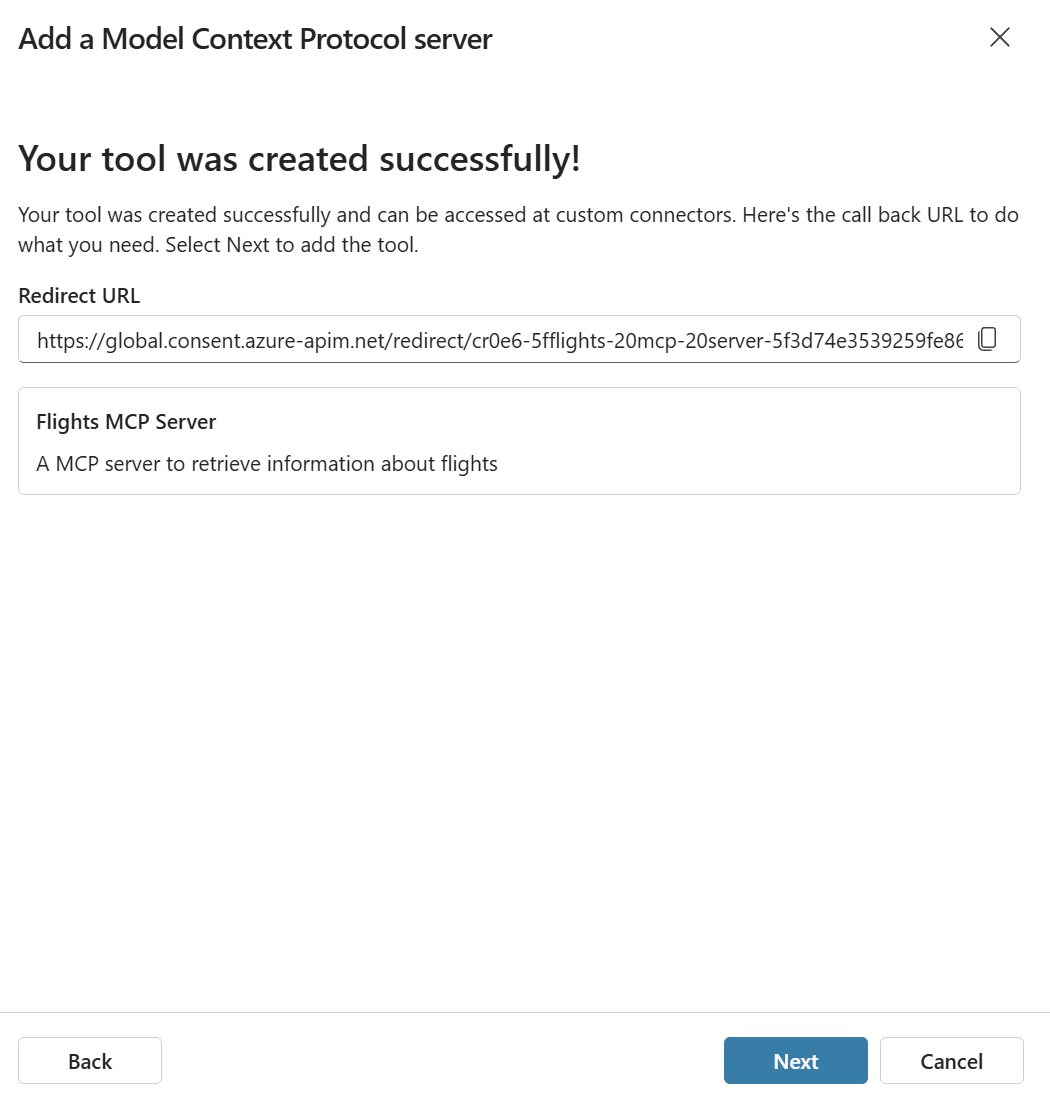
Copy this redirect URL and add it to your app registration in Microsoft Entra:
- Go to the Azure portal and navigate to your app registration.
- Click on Authentication in the left menu.
- Under Platform configurations, click on Add a platform if you haven’t already, and choose Web.
- Add the redirect URL you copied from Copilot Studio.
- Click Save.
Important: You must complete this step before clicking Next in the Copilot Studio wizard. If you skip this, the authentication flow will fail because Microsoft Entra won’t recognize Copilot Studio as a valid redirect destination.
Creating the connection
Once you’ve added the redirect URL to your app registration, go back to Copilot Studio and click Next. You’ll be prompted to create a connection by signing in with a valid Microsoft Entra account.
Click the sign-in button and complete the authentication flow using your organizational account. This step establishes the connection between Copilot Studio and your protected MCP server.
After successful authentication, click Add and configure to finalize the setup. Copilot Studio will redirect you to the tool configuration page.
Verifying the tools
If everything was configured correctly, you should now see all the tools exposed by your Flights MCP server listed in the Tools section of your agent. For our Flights MCP server, you should see the following four tools:
- get_airport_origins: List all available departure airports
- get_airport_destinations: List all available destination airports
- get_flight_details: Get detailed information about a specific flight
- search_flights: Search for flights by origin, destination, and departure date.
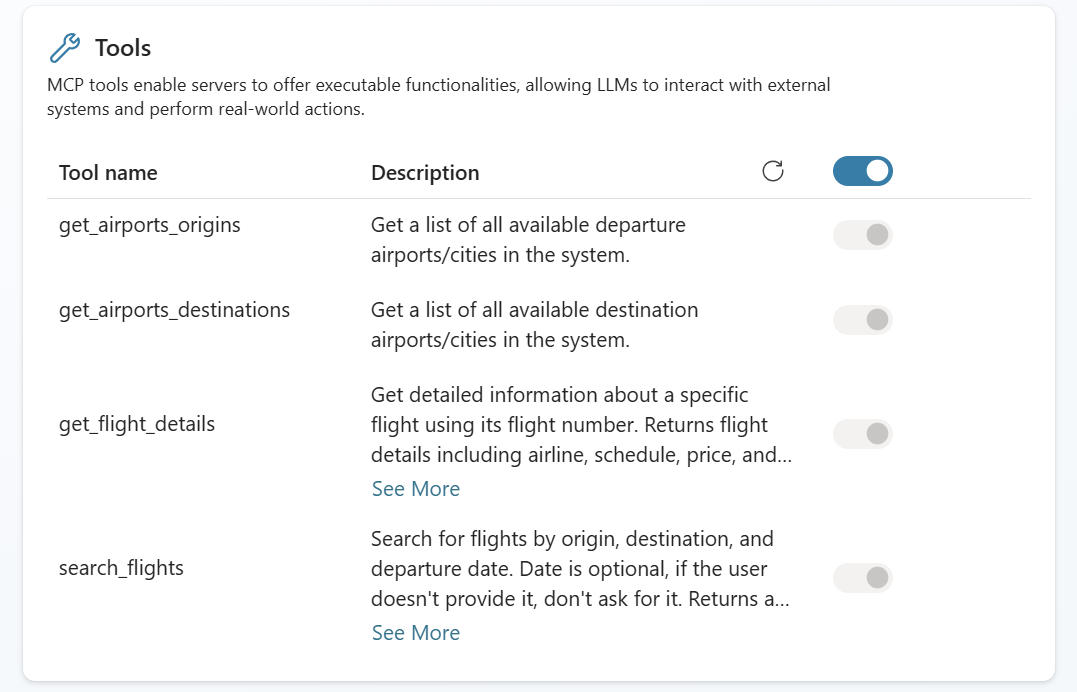
These tools are automatically imported based on the tool definitions in your MCP server. The descriptions you provided using the [Description] attributes in your .NET code are used here to help the agent understand when and how to use each tool.
Testing the agent
Now we’re ready to test our flight search agent! Use the test panel built into Copilot Studio to interact with the agent.
Try asking a question like:
Find me flights from New York to London
The agent should recognize that it needs to use the search_flights tool from the MCP server. The first time you use it, you’ll see the agent requesting to create a connection. You just need to click on Open connection manager and then click Connect near the name of the MCP server. After doing that, you can click on Retry and then the agent will call the MCP server and return the results.
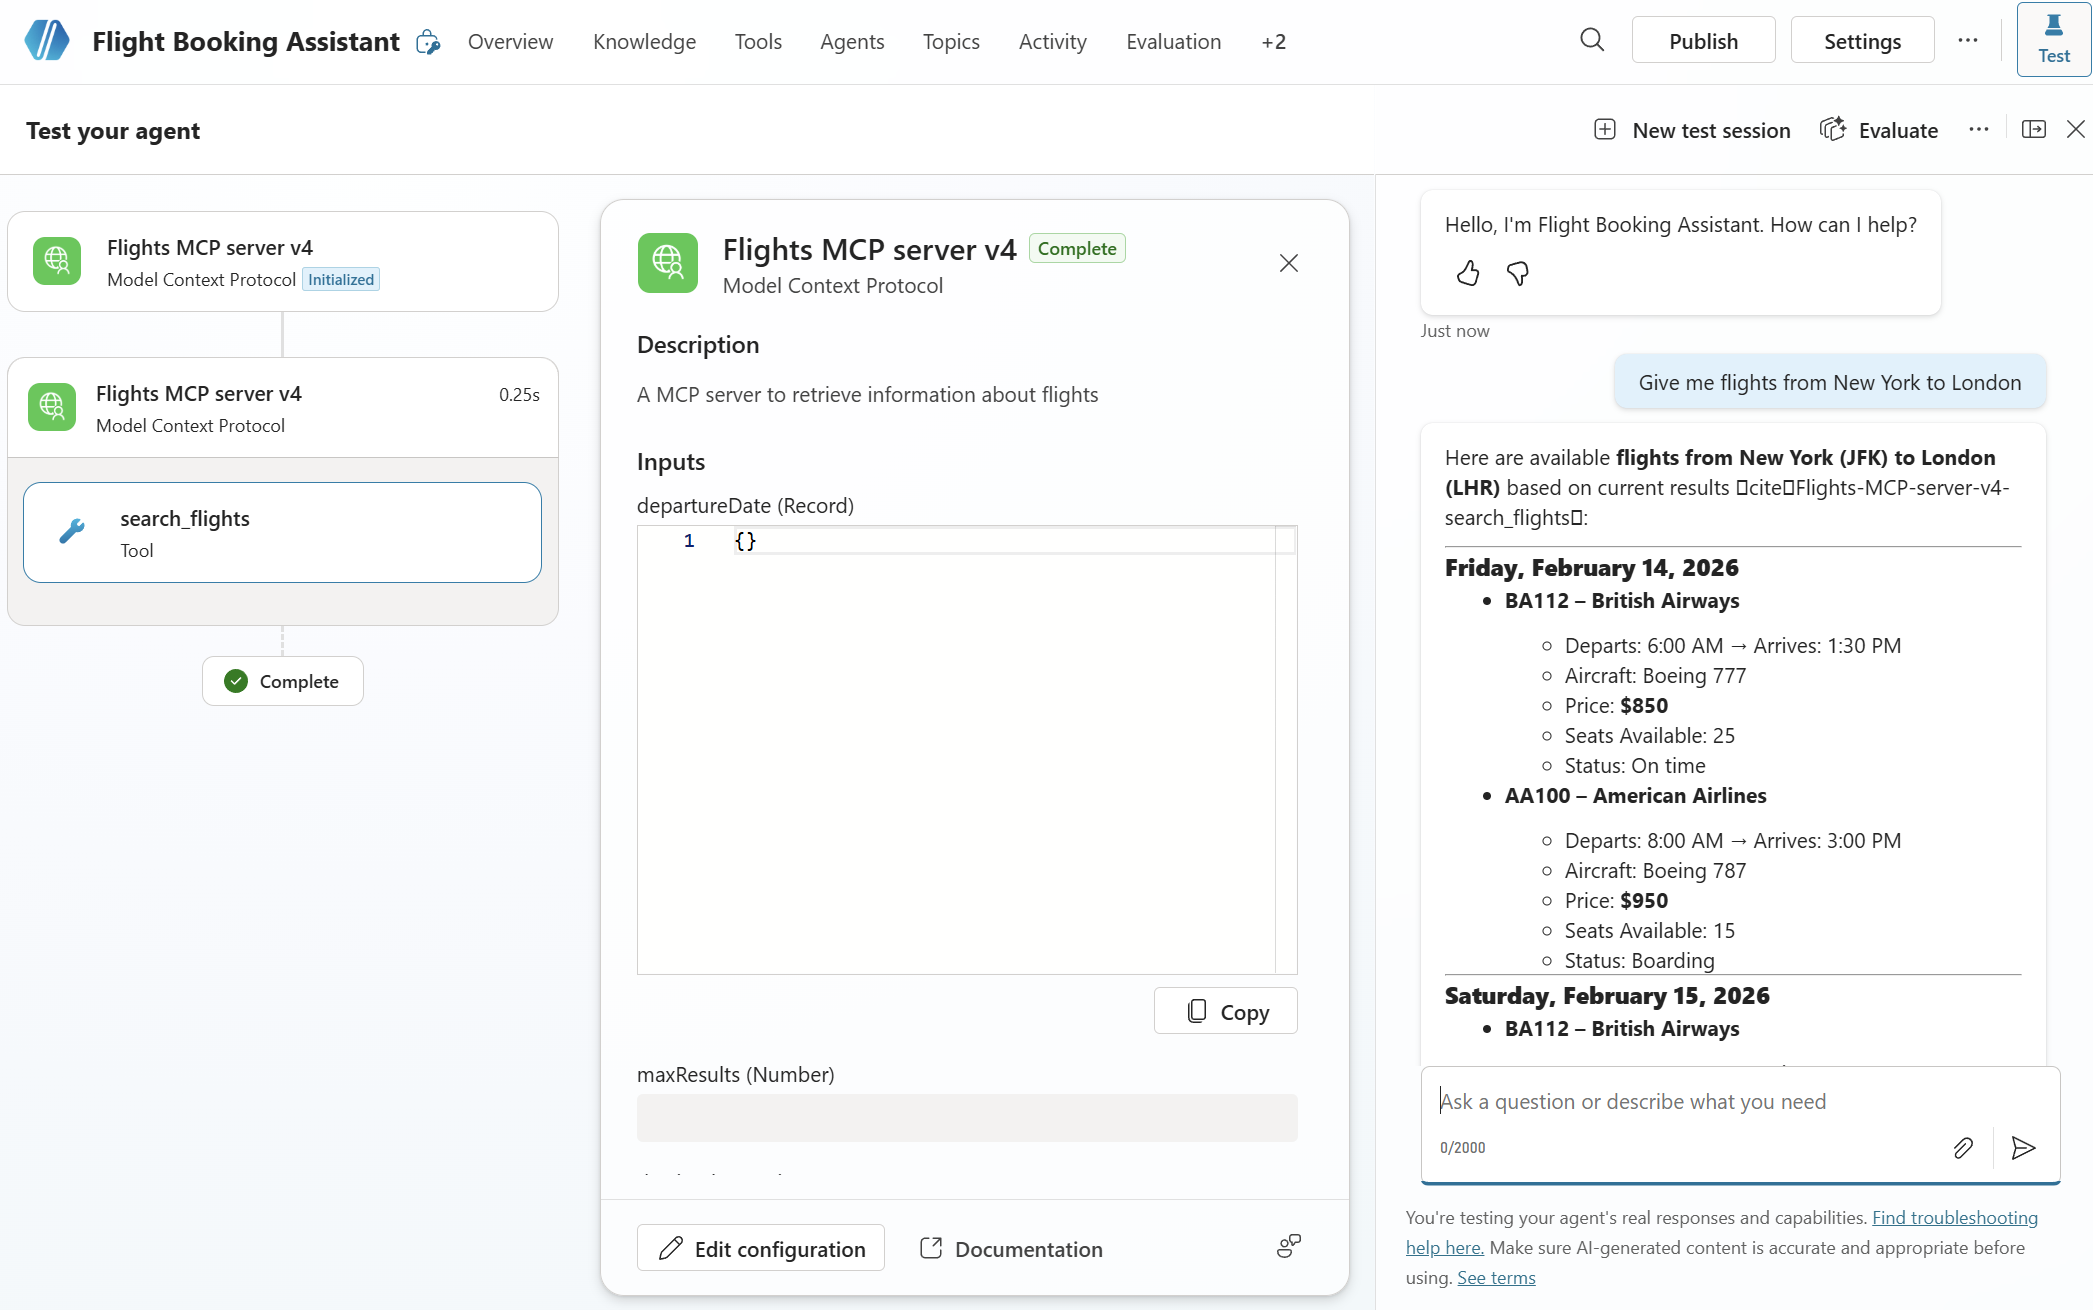
We did it! The custom engine agent is now successfully consuming our Entra-authenticated MCP server.
What happens behind the scenes?
One interesting aspect of how Copilot Studio handles MCP servers is worth calling out. When you add an MCP server to your agent, Copilot Studio creates a custom Power Platform connector behind the scenes. This connector acts as the bridge between your agent and the MCP server.
This design choice has important implications for enterprise scenarios:
- Governance: Administrators can manage and monitor MCP connections using the same tools they use for standard Power Platform connectors.
- Data Loss Prevention (DLP): Connectors can be classified and controlled through DLP policies.
- On-premises support: If your MCP server is hosted on-premises, you can potentially use the on-premises data gateway to establish connectivity, just like you would with any other Power Platform connector.
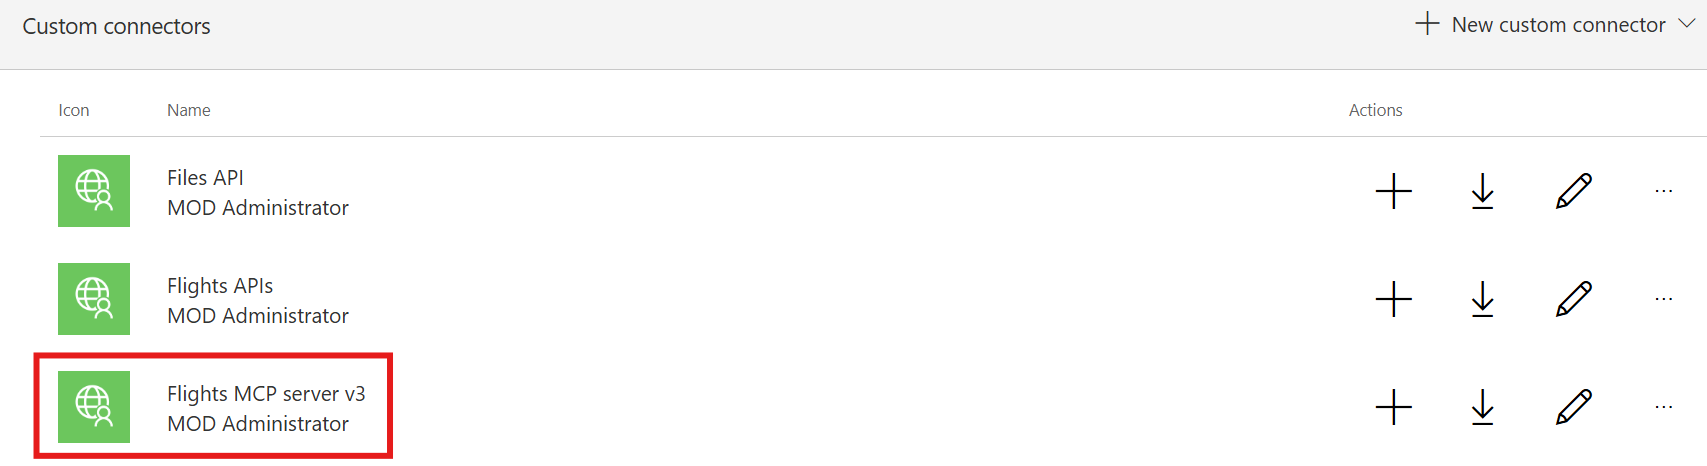
You can verify that by opening the Power Platform portal, clicking More in the left sidebar and looking for the section named Custom connectors. You will see the custom connector which is mapped to your MCP server in the list.
Additional resources
If you want a more hands-on experience with MCP and OAuth in Copilot Studio, I recommend checking out the Copilot Developer Camp. The lab provides a step-by-step walkthrough of connecting Copilot Studio to an OAuth-protected MCP server.
You can also find the complete source code of the Flights MCP server on GitHub.
Wrapping up
In this post, we’ve seen how to connect a custom engine agent built with Copilot Studio to an MCP server protected with Microsoft Entra authentication. Compared to the declarative agent approach we explored in the previous post, the Copilot Studio experience is notably smoother:
- Streamlined wizard: Copilot Studio provides a guided experience for configuring OAuth, eliminating the need to manually edit YAML files or fix parameter types.
- Automatic tool discovery: Once the connection is established, the tools are imported automatically without requiring additional fetch operations.
- Power Platform integration: The connector-based architecture brings MCP servers into the familiar Power Platform governance model.
The main thing to remember is the redirect URL step: make sure to copy the URL from Copilot Studio and add it to your app registration before completing the wizard. Other than that, the process is quite straightforward.
Happy coding!