In all the examples we have seen so far when implementing the Model Context Protocol (MCP), we have assumed that our backend didn’t require any authentication. This is a common scenario when we are just experimenting with the protocol, but in real-world applications, we often need to connect to APIs that require some form of authentication.
Let’s say we want to build an MCP server that we can connect to an agent to get information about parks in the US. The National Park Service (NPS) provides a public API that you can use to retrieve information about pretty much everything related to US national parks: generic data, activities, places. This API is well documented here: https://www.nps.gov/subjects/developer/api-documentation.htm. The site includes a page created with Swagger, which you can use to test the API without writing any code. However, the first thing you will notice is that all the endpoints have a lock icon next to them. At the top of the page, you will see an Authorize button. If you click on it, you will be asked to provide an API key, which will be passed as a query parameter called api_key.
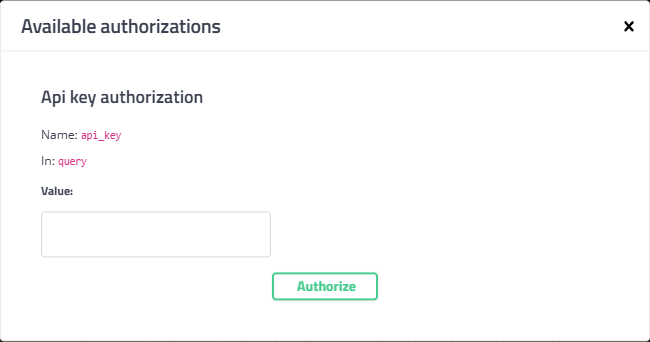
How can we manage this requirement if we want to build an MCP server from these APIs and use it with an agent created in Copilot Studio? Let’s see that! Before we start writing code, however, make sure to request an API key from the NPS website. It’s free!
Creating our MCP server
This time, we’ll learn something new and build the server using TypeScript and the corresponding MCP SDK.
Let’s start by creating a new TypeScript project. To perform the following tasks, you will need to have Node.js installed on your machine. If you don’t have it yet, you can download it from the official website.
Open a terminal and create a new directory for your project:
1
2
mkdir parks-http-typescript cd parks-http-typescriptInitialize a new Node.js project:
1npm init -yInstall TypeScript and ts-node as development dependencies. ts-node allows you to run TypeScript files directly without compiling them first:
1
2
npm install typescript --save-dev npm install ts-node --save-devSince we’re going to use the Streamable HTTP transport layer, we also need to install the
expressframework, which will help us expose the MCP server through an HTTP endpoint:1npm install expressInitialize a TypeScript configuration file:
1npx tsc --initOpen the tsconfig.json file with an editor (like Visual Studio Code) and set the following properties:
 1
 2
 3
 4
 5
 6
 7
 8
 9
10
11
12
13
14
15
16
{ "compilerOptions": { "target": "ES2020", "module": "NodeNext", "moduleResolution": "nodenext", "outDir": "./dist", "rootDir": "./src", "strict": true, "esModuleInterop": true, "skipLibCheck": true, "forceConsistentCasingInFileNames": true, "sourceMap": true }, "include": ["src/**/*"], "exclude": ["node_modules"] }Adjust the package.json file to add a script for running the application using ts-node:
1 2 3 4"scripts": { "build": "tsc", "start": "ts-node src/app.ts" },As the final step, let’s install the MCP SDK for TypeScript:
1npm install @modelcontextprotocol/sdk
Now we can open our solution in Visual Studio Code and start writing the actual implementation. Let’s start by creating a new app.ts file in the src folder. This will be the primary entry point of our application.
First, let’s see how we can set up the MCP server using the TypeScript SDK:
| |
Similar to what we have seen with the C# SDK, the TypeScript SDK greatly simplifies setting up the MCP server:
- First, we need to create a new instance of the
McpServerclass, passing the name and version of our MCP server. - Next, we need to define the transport layer we want to use. In this case, we are using the
StreamableHTTPServerTransport. For simplicity, we’re going to use a stateless server, so we set thesessionIdGeneratortoundefined. - Finally, we call the
connect()method on the server instance, passing the transport layer we just created.
Since we’re using the Streamable HTTP transport layer, we need a way to expose it through an HTTP endpoint. In C# and .NET we were using the built-in ASP.NET Core middleware to map the MCP server to an HTTP endpoint. In Node.js, we can use the express framework to achieve the same result.
| |
Now we can implement the MCP endpoint:
| |
We’re simply implementing the specs of the MCP protocol. We’re setting up an endpoint (/mcp) that will handle POST requests. When we receive a request, we call the handleRequest() method of the transport layer, passing the request and response objects. This process will automatically manage the communication between the MCP server and the MCP client.
If an error occurs while handling the request, we log it to the console and return a 500 Internal Server Error response.
Just to make sure that our endpoint responds properly, let’s also implement the two other HTTP verbs, GET and DELETE. In this case, however, we’ll simply return an error response, since the MCP protocol only uses POST requests for communication:
| |
Finally, we can spin up the server by listening to a specific port, in this case 3000:
| |
First we call the setupServer() function we defined earlier to start the MCP server. Once it’s up & running, we call the listen() method on the Express app to start listening for incoming requests on the specified port.
Exposing the APIs
For the purpose of this demo, we’re just going to expose one of the many endpoints provided by the NPS API — specifically, the one that returns a list of parks.
First, let’s create a new file called parksService.ts in the src folder. In this file, we will implement the logic to call the NPS API and return the list of parks.
Let’s start with the definition of the interfaces that represent the data we expect to receive from the NPS API:
| |
We’re going to use the Axios library to simplify making HTTP requests to the NPS API, so let’s install it as a dependency in the terminal:
| |
Now let’s add to our parksService.ts file the definition of a class that we can use to interact with the NPS API:
| |
We’re setting up an axiosInstance object using the base URL of the NPS API and setting the Accept header to application/json to indicate that we expect a JSON response.
Next, let’s implement a method to retrieve the list of parks:
| |
We use the axiosInstance we have set up to make a GET request to the /parks endpoint, which will return the ParksResponse object that we have previously defined.
Notice also that we’re passing an apiKey parameter to the getParks() functio, which we’re including in the HTTP request to the API as a query parameter named api_key. This means that the request that Axios performs will look like https://developer.nps.gov/api/v1/parks?api_key=abcdef
Please note: to simplify the demo, we’re returning only the first 3 items of the collection, otherwise the response might be too big to be processed by Copilot Studio.
Now that we have our service ready, we can implement the MCP tool that will expose this functionality to agents. But, first of all, we must manage the authentication process.
Managing authentication with an API key
When you’re working with custom connectors with Copilot Studio, you can set up the authentication with different methods. One of them is API key authentication, and it allows to specify in which way the custom connector will pass the key to the API backend. It could be a header in the HTTP request, a query parameter, etc.
In our case, we’ll go with the header option: we’ll read the API key from a header in the HTTP request named x-api-key. This is a common practice when working with APIs that require an API key for authentication.
This is how we need to change the /mcp endpoint in the app.ts file to support this scenario:
| |
First, we’re setting a variable called myApiKey to store the API key. The reason for this is that Copilot Studio doesn’t pass the API key every time it calls the MCP server, but only the first time. So, we need to store it in a variable to use it later when calling the NPS APIs.
Then, we change the app.post() method to read the x-api-key header from the request. If the header is present and is a non-empty string, we store it in the myApiKey variable.
Important! This is a simplified approach to storing the API key, which works fine when you’re running the MCP server locally. However, once you deploy it on Azure or any other cloud provider, you should use a more reliable way to store the API key, since the MCP server might be stateless and unable to persist the value of the
myApiKeyvariable across different requests.
Implementing the MCP tool
Now that we have the API key stored in a variable, we can implement the MCP tool that will expose the functionality to retrieve the list of parks. The TypeScript SDK for MCP makes this very simple. Let’s add the following code to the app.ts file:
| |
Tools are defined by calling the tool() function of the McpServer instance. The first parameter is the name of the tool, the second is a description, which is very important to help the LLM to understand its purpose.
In this case, the tool supports an input parameter, which is the US state we want to filter parks by. We use the Zod library to define an input parameter called stateCode, which is a string. Also in this case, we must provide a description of the parameter, which will be used by the LLM to understand how to properly fill it.
Then, we can write the code that we want to execute when the tool is called. In this case, we call the getParks() method of the parkService instance, passing the API key and the state code as parameters. The response is then returned as a content object, which contains a text field with the JSON-stringified response.
Running the MCP server
Now that we have implemented the MCP server and the tool to retrieve the list of parks, we can run the server. In the terminal, run the following command:
| |
If everything goes well, you will see the following output:
| |
If you open the browser and navigate to http://localhost:3000/mcp, you will see the following response:
| |
This is the expected response, since the MCP protocol only supports POST requests. When you hit the URL with the browser, instead, you’re just performing a GET.
Since you’re still in Visual Studio Code, use the port forwarding feature we explained in one of the previous posts to expose the MCP server to the Internet. We’ll need to expose the port 3000.
Setting up the custom connector in Copilot Studio
Now we can move to Copilot Studio and set up the custom connector to connect to our MCP server. We can do that in the Custom Connector section from the Power Platform portal. The direct URL is https://make.powerapps.com/environments/<guid>/customconnectors, where <guid> is the ID of your environment.
In the previous post we have seen how to create a custom connector for a MCP server using the new Copilot Studio capabilities, so in this post we’re going to focus on the authentication part.
After you have set the proper URL of your MCP server in the Host field (make sure also to set the Base URL to /mcp, which is the endpoint we have defined in the MCP server), you can click on the Security tab and select API Key as the authentication type. You will be asked to configure how the custom connector will provide the API key to your backend. Set it as follows:
- Parameter label: API key
- Parameter name: x-api-key
- Parameter location: Header
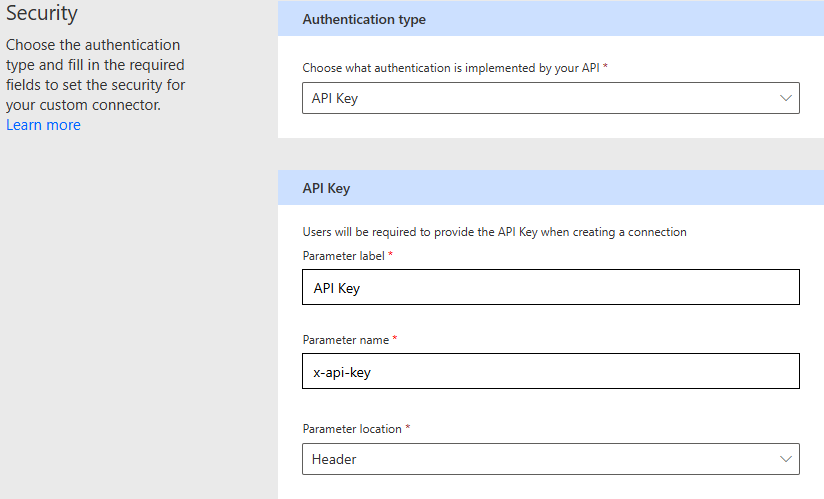
Now you can move on and click on the Create connector button to create the custom connector.
Using the connector in an agent
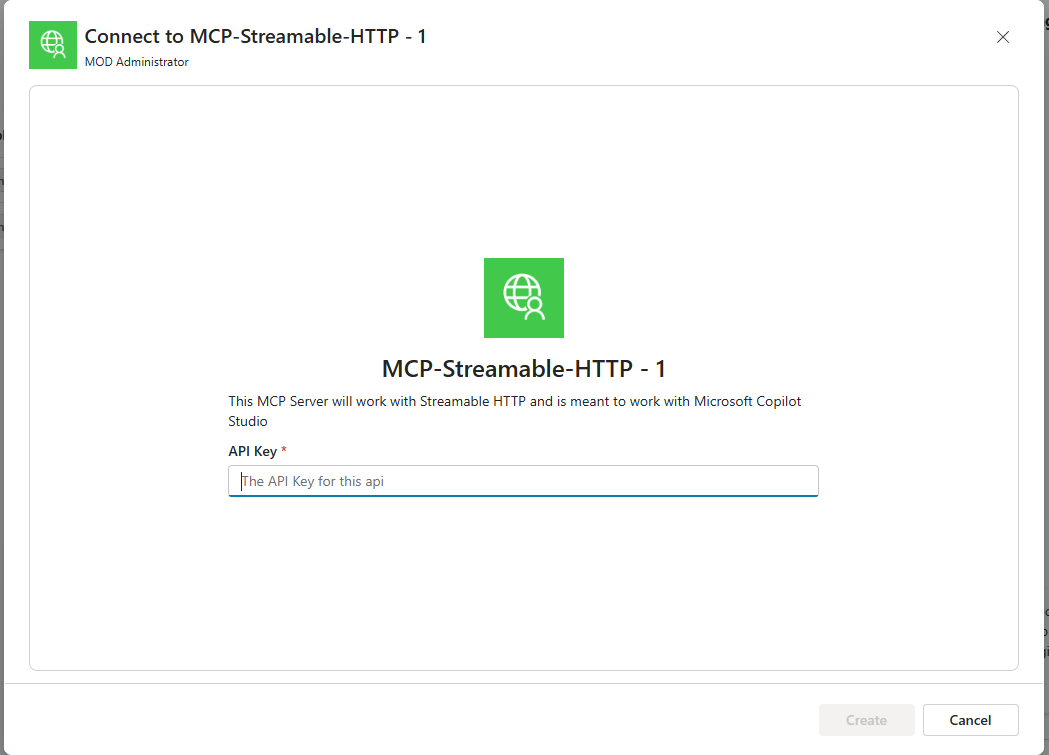
The way you’re going to use this new MCP server in an agent in Copilot Studio is no different from the way we used it in the other posts. You’ll need to go to the Tools section of your agent and click on Add tool. Then, select the Model Context Protocol label and you will see the new MCP connector you’ve just created. Click on it to add it to your agent.
The only difference is that, when you are asked to create a new connection, you will need to provide the API key you previously obtained from the NPS website:
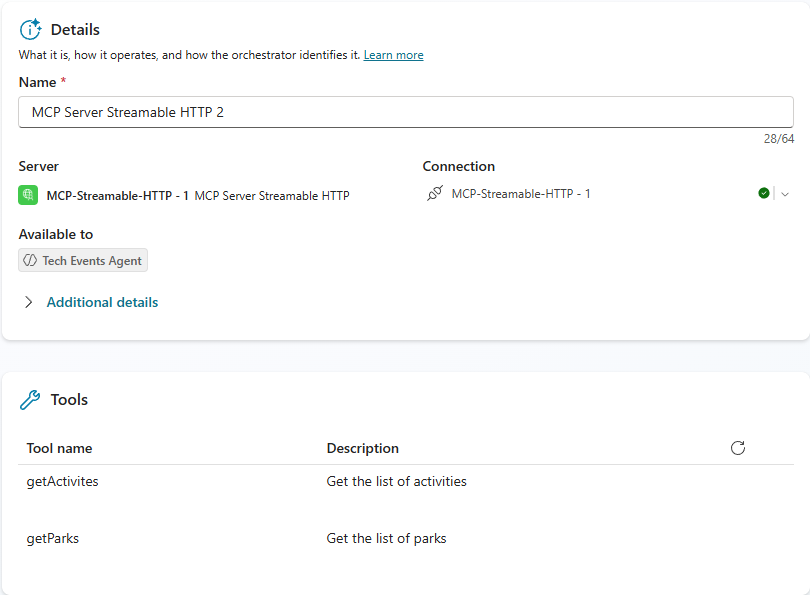
Once you have added the tool to your agent, you should be able to click on it in the Tools section and see the list of available tools:
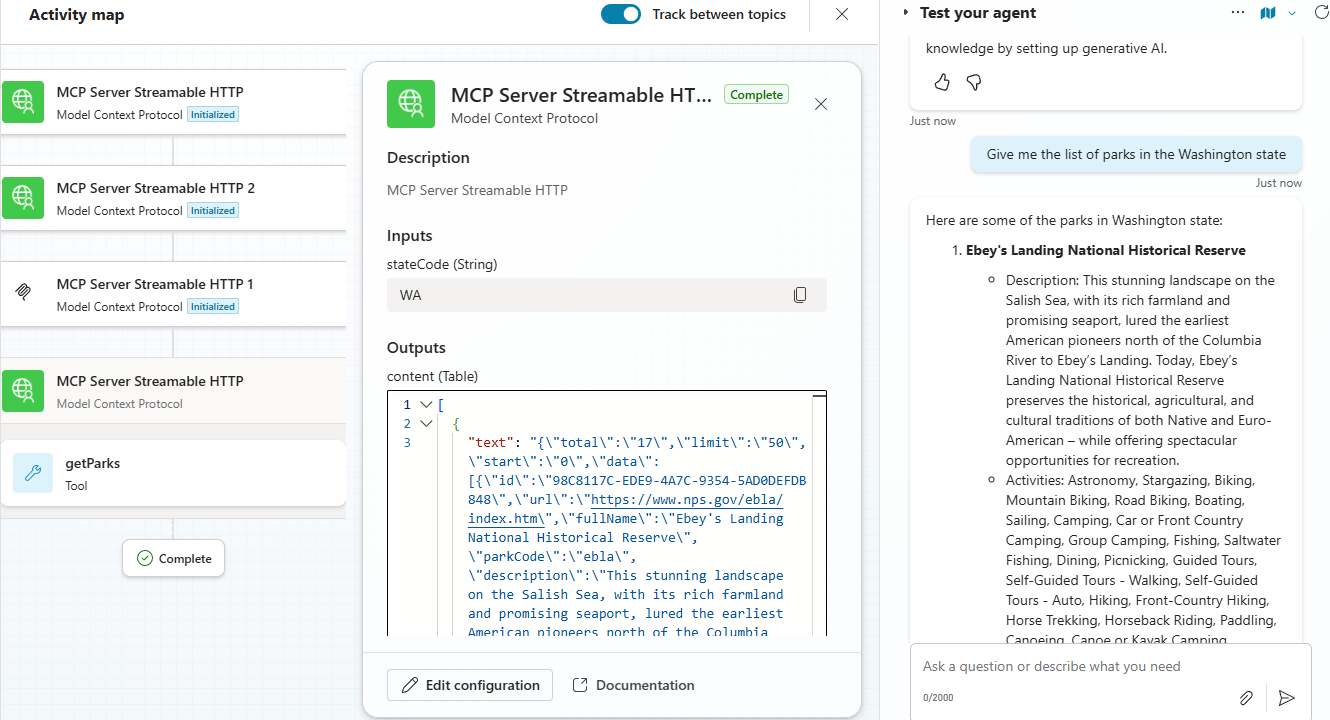
And now, you can test the tool by writing a prompt that requires the use of the getParks tool, such as:
| |
In the screenshot below, you can see how the agent used the getParks tool to retrieve the list of parks, automatically providing the state code WA as the input parameter.
Wrapping up
In this post, we have seen how to implement a Model Context Protocol (MCP) server using TypeScript and how to use it to expose an API which requires authentication with an API key, in this case the NPS APIs, which you can use to retrieve information about US national parks.
We have also seen how to tweak our custom connector in Copilot Studio so that we can connect to the MCP server and automatically pass the API key to the backend.
You can find the working sample of the solution we’ve built in this post in the official Copilot Studio MCP repository on GitHub.
Happy coding!