
In the previous post, we took an authenticated Model Context Protocol (MCP) server we had built ourselves and turned it into a federated Copilot Connector, so that Researcher and Copilot Chat could query it live, on demand, without ingesting any data into the tenant. This post is a standalone follow-up, but it builds directly on that work: we’re going to reuse the exact same MCP server and, more importantly, the exact same Microsoft Entra client app registration and Teams Developer Portal OAuth registration. The output of the previous post is, quite literally, the input of this one.
The reason I’m writing this comes from a real customer engagement. A customer expressed interest in building plugins for Microsoft 365 Copilot Cowork to connect it with their own data. It was a new topic for me, so I started researching it, and while doing so I noticed something worth sharing: a federated connector and a Cowork plugin both authenticate their MCP connector through the same configuration model in the Teams Developer Portal. In other words, the OAuth registration we already produced for the federated connector can be plugged straight into a Cowork plugin, without creating anything new.
When you step back, this consistency makes sense. MCP server integration across the Microsoft 365 Copilot ecosystem follows the same pattern, and it now covers three different features:
- Declarative agents with authenticated MCP servers, which we covered earlier on the blog.
- Federated connectors, the subject of the previous post.
- Cowork plugins, which is what we’re going to explore here.
All three reuse the same Teams Developer Portal OAuth configuration to authenticate against the same Entra-protected MCP server. Once you’ve set up the authentication once, you can light up each of these surfaces by pointing them at it.
As usual, before we get into the how, let’s spend a moment understanding the why, starting with what Cowork actually is. Let’s get started!
What is Copilot Cowork?
Compared to agents and the standard Copilot Chat experience, Copilot Cowork completes multi-step tasks on your behalf. Instead of answering a single question or running a single tool, you describe the outcome you want, and it grounds the work in your emails, meetings, files, and business data, powered by Work IQ. Cowork plans the steps, picks the right skills and apps for the job, pauses for your approval at key checkpoints, and returns finished artifacts (a deck, a report, an email, or a status update) ready for your review. The mental model is less “chat assistant” and more “a colleague who takes a task, works through it, and comes back with a draft”.
Cowork reached general availability on June 16, 2026, with a consumption billing model based on Copilot Credits.
Like the rest of the Copilot ecosystem, Cowork can be extended, and it’s extended using Skills, which are prompt-based instructions that teach Cowork how to perform a certain kind of task and when to do it. On top of the skills concept (which is a standard in the industry, supported by many tools and platforms), Cowork provides a plugin infrastructure, which adds two capabilities:
- Connectors, which give skills live reach into an external platform or service through an MCP server.
- Governance. Plugins can be treated like agents or apps in the Microsoft 365 ecosystem, so they can be deployed, blocked, restricted to a set of users, etc.
Both skills and connectors are delivered together as a Microsoft 365 App Package: a .zip file with a manifest and its assets. This is the same distribution mechanism already used for Teams apps, Copilot agents, and Office add-ins, so if you’ve shipped any of those before, the packaging model will feel familiar.
Federated connectors vs. Cowork plugins
Since we’re coming from the federated connector post, it’s worth drawing a clear line between the two, because they look similar but serve different purposes.
Both achieve the same high-level goal: they enrich the Copilot experiences with additional capabilities by tapping into external platforms and services. The key differentiator is what kind of capability they’re allowed to add:
- A federated connector is made to enrich knowledge. It’s a querying surface, so it supports read-only tools only. Its job is to bring live data into Copilot, not to change anything in the external system.
- A Cowork plugin can go further. Because Cowork is built to complete tasks, a plugin can use its MCP tools to take actions, not just read data. The same MCP server that surfaces information can also be allowed to perform write operations on the external platform.
Our sample stays deliberately read-only, since it’s the same customer-and-invoice server from the previous post. But it’s important to know that the capability is there: if your MCP server exposes tools that create or update records, a Cowork plugin is able to call them.
Here’s the part that ties everything together, and the reason this post can be so short compared to the previous one: the authentication layer is identical and reused. Same MCP server, same Microsoft Entra client app registration, same Teams Developer Portal OAuth registration and Reference ID. We don’t have to register a new application, expose a new scope, or create a new OAuth connection. Everything we did in the previous post applies here unchanged. All that’s left is to describe the connector to Cowork through a manifest.
Anatomy of the plugin package
As we mentioned, a Cowork plugin is a Microsoft 365 App Package, which is a .zip file. With all the files placed at the root of the archive, here’s what ours contains:
manifest.json— the Microsoft 365 Unified App Manifest (version 1.28) that declares the plugin, its skill, and its MCP connector.color.png— the full-color app icon, 192x192 pixels.outline.png— the monochrome outline icon, 32x32 pixels.toolDescription.json— the description of the MCP server’s tools, in the format Cowork expects.skills/customer-data-assistant/SKILL.md— the skill that teaches Cowork when and how to use the connector.
Let’s go through the two files that do the real work: the manifest, which wires up the connector, and the skill, which tells Cowork when to reach for it.
Declaring the connector in the manifest
The manifest.json file is the heart of the package. It declares the plugin’s identity and icons (the standard fields you’d find in any Microsoft 365 app manifest), and then it references two things that matter for us: the skill, under agentSkills, and the MCP connector, under agentConnectors. Here’s the full file:
| |
Let’s take a look at the agentConnectors block, since it’s the one that’s new compared to a plain skill-only package. Each entry describes a single connector: an id and a displayName that Cowork shows in the UI, a description, and a toolSource. For a remote MCP server, the toolSource is a remoteMcpServer object made of three parts:
mcpServerUrlis the public URL of our MCP server, including the/mcppath. It’s the very same endpoint we exposed through a dev tunnel in the previous post.mcpToolDescriptionpoints to afile,toolDescription.json, which lists the tools the server exposes. We’ll look at this file in the next section.authorizationis where the reuse happens, and it deserves its own sub-section.
Reusing the Reference ID
The authorization block uses the type OAuthPluginVault, and its referenceId is the exact same Reference ID that the Teams Developer Portal generated for us in the previous post, when we set up the OAuth client registration for the federated connector.
This is the key point of the whole post: there’s no new Entra app registration and no new Teams Developer Portal registration to create here. The OAuth connection we registered for the federated connector already knows how to obtain a token for our MCP server, on behalf of the signed-in user, using our dedicated client application. By referencing it through OAuthPluginVault, the Cowork plugin reuses that same connection as-is, nothing more to configure.
Remember to replace <your-teams-developer-portal-reference-id> with the actual Reference ID you copied from the Teams Developer Portal when you created the OAuth connection in the previous post, and to replace https://<tunnel-id>-5000.euw.devtunnels.ms/mcp with the real public URL of your MCP server, including the /mcp path. For the sake of this demo we’re pointing at a dev tunnel; in a production scenario this would be the stable public endpoint where your server is hosted.
Describing the tools with toolDescription.json
In the manifest, mcpToolDescription points to a file rather than listing the tools inline. That file, toolDescription.json, has a specific shape: it must be a JSON document that matches the server’s tools/list response. In other words, it’s the same list of tools your MCP server would return when a client asks it what it can do, with a top-level tools array where each entry has a name, a description, and an inputSchema:
| |
As you can see, each tool entry mirrors exactly what the MCP server advertises: the name Cowork will call, a description that helps the model decide when the tool is appropriate, and an inputSchema (a JSON Schema object) that declares the parameters and which of them are required. I’ve shown two of the seven tools here, search_customers and fetch_customer; the remaining five follow the same shape.
For reference, the full set of seven tools our server exposes is: search_customers, fetch_customer, query_customers, count_customers, search_invoices, fetch_invoice, and query_invoices. Since this is the format the file expects, the cleanest way to produce it is to take your server’s actual tools/list output and wrap it as shown above.
Teaching Cowork when to use the connector: the skill
Declaring the connector makes the tools available, but it doesn’t tell Cowork when it should reach for them. That’s the job of the skill, which lives under skills/customer-data-assistant/SKILL.md. This is the same skills format Cowork uses on its own; the only difference is that our skill is paired with a connector and routes the user’s requests to its tools.
A SKILL.md file is made of two parts: a YAML frontmatter block and a Markdown body. The frontmatter is the most important part, because its name and description are what Cowork reads to decide whether the skill is relevant to what the user is asking. Here’s our frontmatter:
| |
Notice how the description does two things at once. It explains the domain the skill covers (customers and invoices held in the company data system), and it gives Cowork concrete trigger phrases, like “find customer CUST-1001” or “how many active customers do we have”. Those example prompts are what help Cowork match a real user request to this skill. The final sentence ties the skill to the connector by naming it: the read-only mcp-data-server connector we declared in the manifest.
The body of the file then describes how to use the connector once the skill has been selected. It contains an Available tools section that lists the seven tools with when-to-use guidance, a set of routing rules, an output format section, and read-only guardrails. The routing rules are the practical heart of it:
| |
This is what makes Cowork reach for the connector’s tools at the right time and pick the right one. The frontmatter gets the skill selected when the conversation is about customers or invoices; the routing rules in the body then translate the shape of the user’s request into the most appropriate tool call. Together, the skill is the “know-how” layer sitting on top of the connector’s live reach.
Deploying the plugin
Now that we have the package, we need to get it into Cowork. There are two ways to do this, depending on whether you want to try it yourself or roll it out to everyone.
The first option is to test it for yourself, which is what you’ll want during development. We can sideload the package using the Microsoft 365 Agents Toolkit CLI (atk). The install command takes the path to our .zip and a scope:
| |
Remember to replace <path-to> with the actual folder where your package lives. The Personal scope installs the plugin just for your own account, which is exactly what you want while you’re iterating on it.
The second option is to publish it to the whole organization. Because a Cowork plugin is a Microsoft 365 App Package, you publish it exactly like you’d publish a Teams application: you upload the package through the Microsoft 365 Admin Center and make it available to your users from there. For day-to-day development, the atk install route is quicker; for an organization-wide rollout, the Admin Center is the way to go.
Trying it out in Cowork
Once the plugin is installed, it shows up in Cowork. On its plugin page we can see both pieces we packaged: the Customer Data MCP Server connector (with a Connect button to run the OAuth flow the first time) and the customer-data-assistant skill.
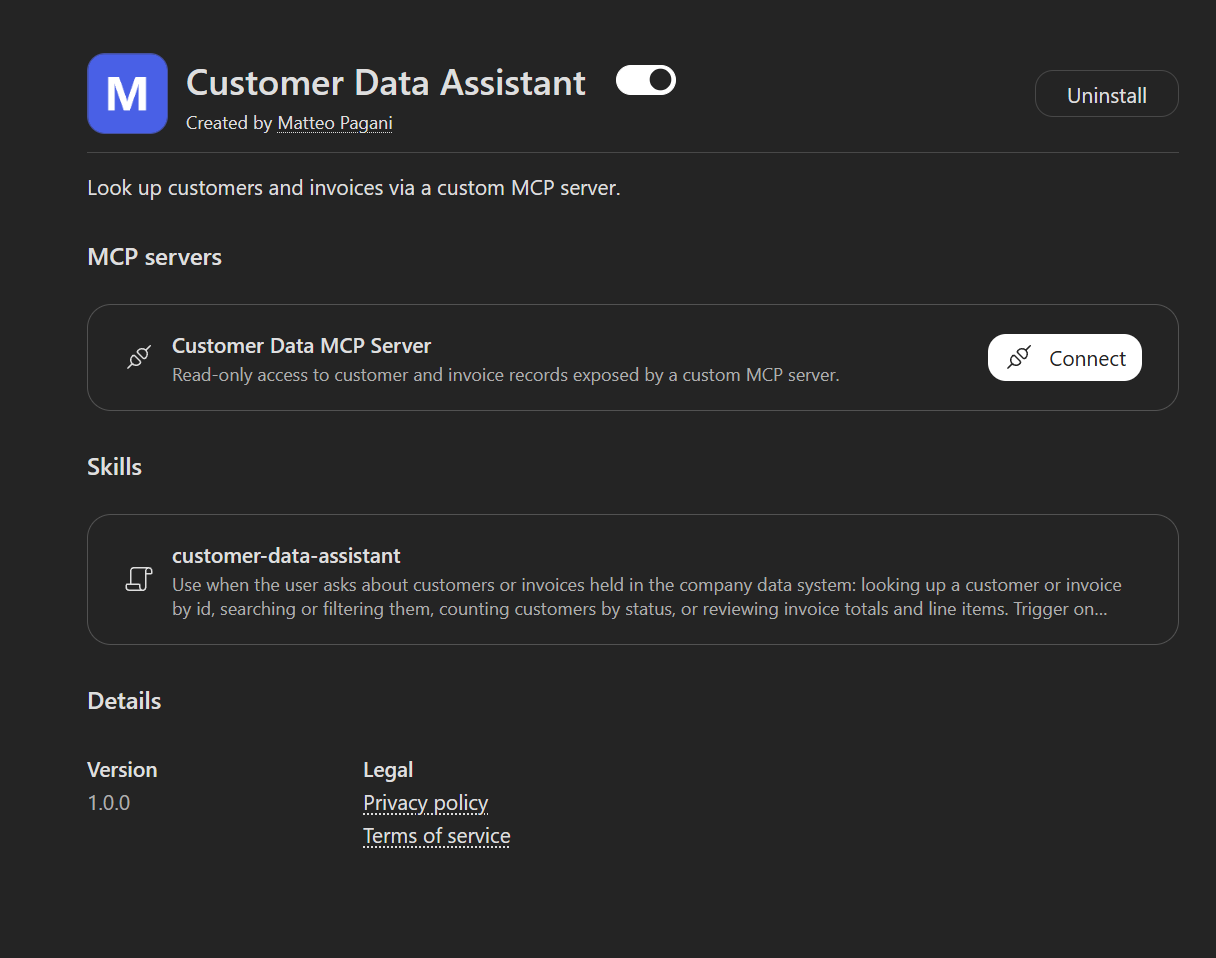
After connecting (which triggers the same OAuth flow we set up in the previous post, now reused through the Reference ID), we can put it to work. The prompt I used was deliberately simple:
I need a list of customers
Cowork matched the request to our skill, called the connector’s tools, and returned all six customers as a table, complete with a summary line:
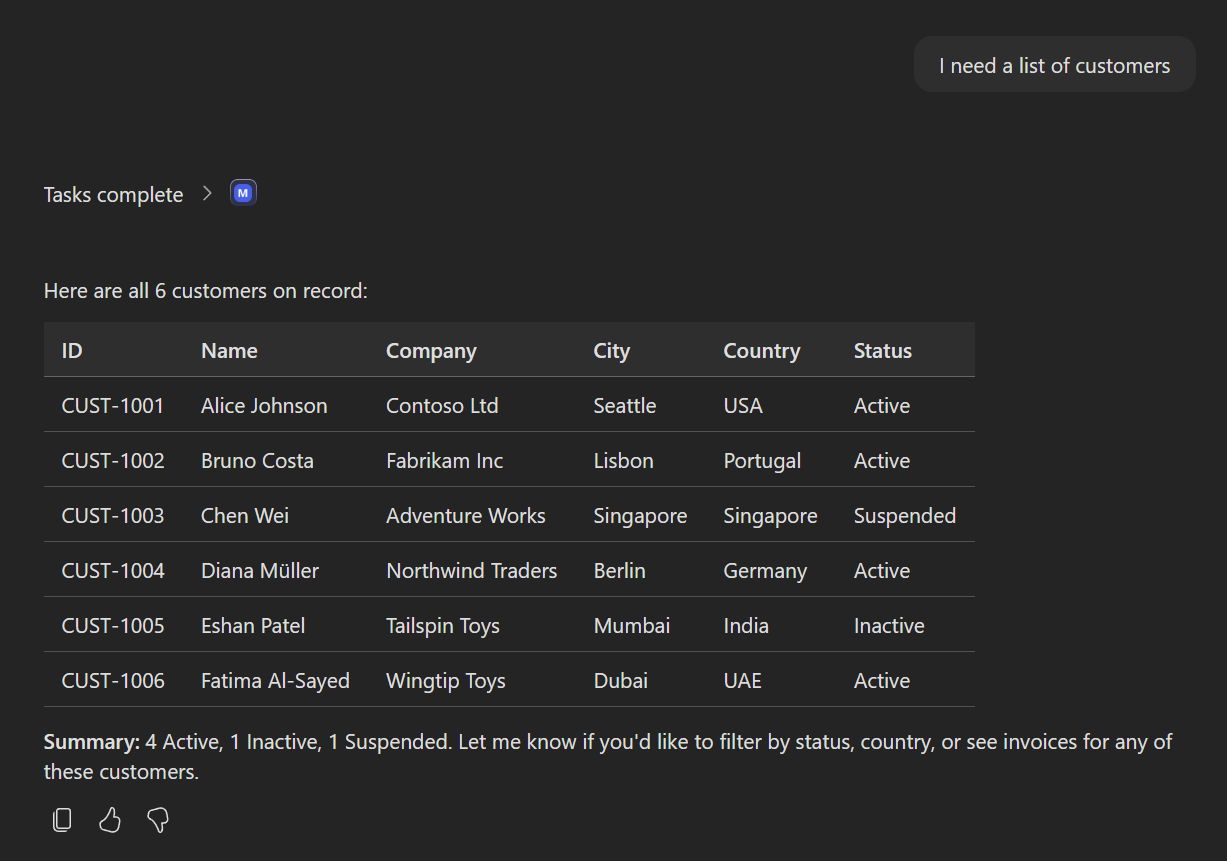
As you can see, our own MCP server is now answering a Cowork prompt with live data, through a plugin we packaged ourselves. We did it!
Wrapping up
In this post, we took the authenticated MCP server and the OAuth registration we’d already built for our federated connector, and we reused them to add the same server as a connector inside a Microsoft 365 Copilot Cowork plugin, paired with a skill that tells Cowork when to use it.
To summarize, here are the steps we went through:
- Reviewed what Cowork is and how it’s extended, through skills (prompt-based know-how) and connectors (live reach into an external system), both delivered as a Microsoft 365 App Package.
- Packaged the plugin as a
.zipwith the manifest, the icons, the tool description, and the skill at its root. - Declared the MCP connector in the manifest, under
agentConnectors, pointingmcpServerUrlat our server andauthorizationat the existing Teams Developer Portal Reference ID throughOAuthPluginVault. - Described the tools in
toolDescription.json, in the format that matches the server’stools/listresponse. - Authored the skill in
SKILL.md, whose frontmatter and routing rules make Cowork reach for the connector’s tools at the right time. - Deployed the plugin, either for ourselves with the Microsoft 365 Agents Toolkit CLI (
atk install ... --scope Personal) or for the whole organization through the Microsoft 365 Admin Center. - Tried it out in Cowork, where a simple “I need a list of customers” prompt returned live data from our server.
The thing worth taking away is the consistency: the same MCP server and the same OAuth registration that powered our federated connector now light up a Cowork plugin too, completing the trio across the Microsoft 365 Copilot ecosystem alongside declarative agents. Set up the authentication once, and you can reuse it everywhere.
You can find the complete source code of the MCP server on GitHub. If you want to dig into the official references, the Cowork plugin development documentation and the agent connectors reference cover the manifest and connector format in detail. And if you haven’t read them yet, the federated connector and declarative agent posts complete the picture of how the same authenticated MCP server fits across the Microsoft 365 Copilot ecosystem.
Happy coding!